Let’s talk yearbooks – An annual compilation of photos from the previous year put into a photobook or album.
One of my fondest memories of being a little girl is climbing into bed with my Gran every Saturday morning and looking through her yearbooks. Each year, she would take the photos she’d taken throughout the year and put them into a photo album (some years, having 3 volumes) with some annotation next to the photos. I always loved looking through them and seeing what she, and the rest of the family had been up to; I was particularly fond of looking at albums from when my cousins, my sisters and I were all really small.
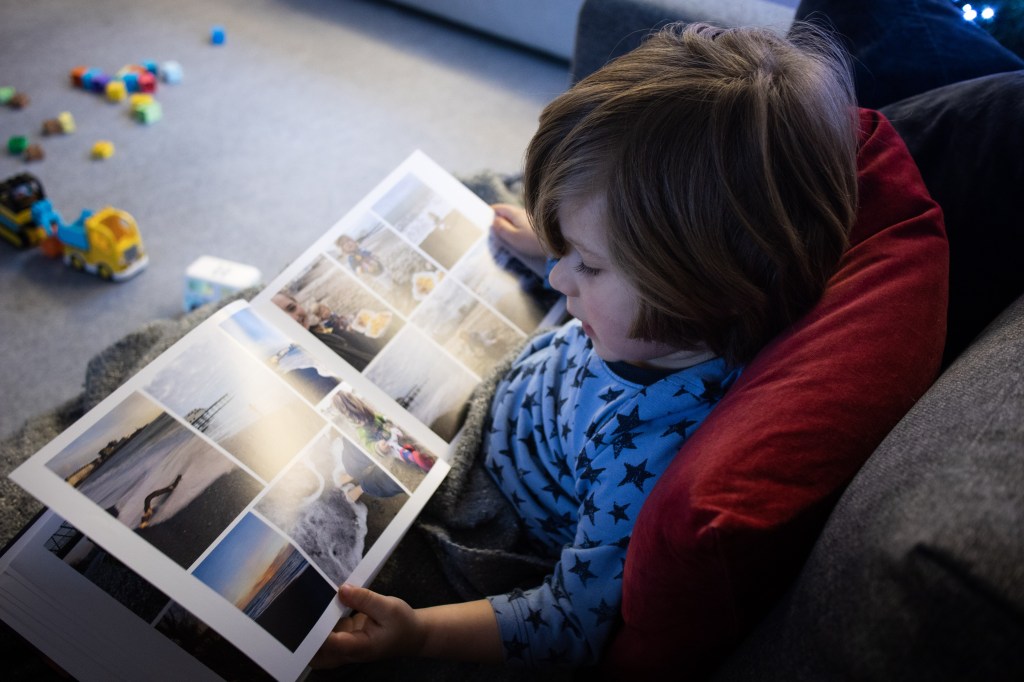
In this digital world we live in, it is so easy to let photos live on a device or in the ‘cloud’ but I love printing my photos, either in photo form or in a photobook and having something tactile to hold. I made a yearbook in 2014, attempted one for 2015 but got slightly overwhelmed and gave up. I skipped the following years up to 2019. 2019 was the year my first child was born and I decided then, that I wanted to create yearbooks to hold my memories and to do something with the photos I took. I now have yearbooks for the last three years and will be starting on 2022 in the new year. My firstborn, now three, loves looking at photos and often asks to look at the photos in my books. I absolutely love snuggling down on the sofa with him and sharing these memories with him.
I mentioned that I got overwhelmed when creating yearbooks in the past but have since developed a strategy to make putting together a photobook simpler. So, here are some tips:
Choosing your photos
This was the part of the process I was overwhelmed by the most. I’d upload ALL the photos I’d taken on my phone via an app and try to choose from the hundreds (sometimes thousands) of photos I’d taken. To make this step easier, I now go through my photos at the end of each month and put them into a ‘favourites’ album on my phone and then upload them to a ‘yearbook’ album on the app I use. This helps to whittle down the photos to my favourite ones and keeps them in chronological order.
Putting the book together
Having completed the first step, it’s a lot easier to put the book together because all photos have been chosen already; it’s just a matter of selecting the photos (I like to do this one month at a time) and dragging them a few at a time onto the page shown on the photobook website – I use Snapfish, just because that’s what the rest of my family uses and it does the job. Snapfish has a ‘reshuffle’ option on the editing section and I make use of this all the time. I simply drag the photo over to the page and then click reshuffle and this rearranges the photos on the page and I choose the layout I like best.
Purchasing the book
I always have to add extra pages to my books because the set number of pages simply aren’t enough, therefore this racks up the cost of the book. Sites like Snapfish often have huge discounts on their products so I just wait until there is discount and then purchase my book.
Enjoying the book
It’s always exciting when something like this arrives in the post so make yourself a drink, sit down and really enjoy looking through your photos from the last year. Share the book with family and friends when you’re together.
I hope this has inspired you to create something special from your photos.